Function
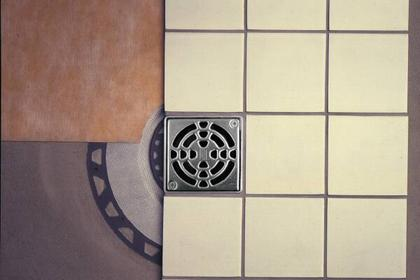
Schluter-KERDI-DRAIN is a floor drain specifically designed to allow connections to Schluter-KERDI or other load-bearing, bonded waterproof membranes, typically in shower applications. Waterproof membranes are currently the newest technology being used in tile installation and are increasingly used for porcelain tile, ceramic tile and natural stone coverings. Schluter-KERDI is adhered to the drains large perforated bonding flange in the shape of a trapezoid. KERDI-DRAIN features a fully adjustable, square grate that is able to accommodate tiles in various thicknesses ranging from 1/4″ (6mm) to 1 1/4″ (32mm). The grate assembly is created to allow for tile adjustment and lateral adjustment as well. KERDI-DRAIN is designed to integrate with not only new construction but old construction being renovated through their simple integration with standard 2″ (51mm) drain pipes.
Material
The drain casing, height adjustment collar, lateral adjustment ring, and strainer are made of acrylic nitrite butadiene styrol (ABS). The drain casing is also available in PVC and features a fleece-covered bonding flange. The grate is available in stainless steel 304 (1.4301 = V2A) and anodized aluminum with a brushed copper bronze, brushed brass, or brushed nickel finish.
The Schluter-KERDI-DRAIN grate, in anodized aluminum, must be tested to verify its suitability if chemical exposure is expected. Cementitious materials, in conjunction with moisture, become alkaline. Due to the fact that aluminum is sensitive to alkaline substances, exposure to the alkali (depending on the concentration and duration of exposure) may result in corrosion (aluminum hydroxide formation). Therefore, it is important to remove mortar or grout residue from visible surfaces. In addition, ensure that the grate is solidly embedded in the setting material and that all cavities are filled to prevent the collection of alkaline water. The anodized layer retains a uniform appearance during normal use. The surface, however, is susceptible to scratching and wear and may be damaged by grout or setting material. Therefore, these materials must be removed immediately.
The Schluter-KERDI-DRAIN grate, in stainless steel, is roll-formed using 304 (1.4301 = V2A) stainless steel. Therefore, the grate’s appearance differs from those made of anodized aluminum. The stainless steel material can sustain high mechanical stresses and is especially well suited for applications requiring resistance against chemicals and acids.
Installation
Shower Bases Constructed with Mortar
(a) If there is access to the plumbing from below, and the waste line will be connected subsequent to installing Schluter-KERDI-DRAIN, the drain can be firmly embedded in a ring of loose mortar and leveled before placing the screed.
(b) When job conditions require the setting of the KERDI-DRAIN by the plumber prior to the installation of the mortar bed (or when there is no access to the plumbing from below), connect the drain to the waste line at the desired height. Pack loose mortar under the bonding flange and drain casing, such that the unit is fully supported, before placing the screed. When installing KERDI-DRAIN over wood substrates, the minimum thickness of mortar required at the perimeter of the bonding flange is 1″.
Note: Schluter®-Systems recommends installing the KERDI-DRAIN according to step 1. (a) above whenever possible. This method affords the installer greater control over the final position of the drain and makes it easier to obtain full support under the bonding flange.
The screed is then placed flush with the top of the trapezoid-perforated bonding flange of the KERDI-DRAIN. Slope the mortar bed using the bonding flange and a perimeter screed as guides.
As soon as the mortar can be walked upon, apply a bond coat of unmodified thin-set mortar to the screed and bonding flange using a 1/4″ x 3/16″ V-notched trowel. Embed Schluter-KERDI in the thin-set mortar and work the membrane onto the entire surface to ensure full coverage and remove air pockets. The KERDI is carried to the step in the fleece-laminated bonding flange (template provided). Be sure the connection between the KERDI and KERDI-DRAIN is secure.
Note: A sheet of cardboard can be placed on the floor to protect the KERDI during subsequent steps.
Construct floor/wall, floor/curb, and wall/wall connections using Schluter-KERDI-BAND or cut sections of KERDI. Seams are easily constructed by overlapping the edges of KERDI or KERDI-BAND by 2″ (50 mm) using an unmodified thin-set mortar.
Seal the shower curb/wall junctionusing Schluter-KERDI-KERECK or Schluter-KERDI-KERECK-F inside and outside corners and unmodified thin-set mortar.
Apply a bond coat of thin-set mortar to the shower walls and curb using a 1/4″ x 3/16″ V-notched trowel. Embed the KERDI in the thin-set mortar and work the membrane onto the entire surface to ensure full coverage and remove air pockets. The KERDI is carried to the height of the showerhead (at minimum).
Note:The thin-set mortar used for bonding Schluter®-KERDI to the walls and curb must be appropriate for the substrate and must penetrate and engage the KERDI fleece. For most substrates (e.g., drywall or CBU), an unmodified thin-set mortar is used. Seams in the membrane are constructed by overlapping the edges of KERDI or KERDI-BAND by 2″ (50 mm) using an unmodified thin-set mortar.
Note: Any protrusions through the KERDI membrane (e.g., mixing valve, shower head, etc.) must be treated with Schluter-KERDI-BAND and Schluter-KERDI-FIX, or equivalent sealant, to ensure a watertight seal.
Once the entire membrane, including seams, corners, curbs, and connection to drain, have been completely bonded and, therefore, waterproofed, the assembly is ready to be tiled.
Note: Prior to setting tile, if the assembly is to be water tested, wait 24 hours to allow for final set of the mortar before testing to ensure waterproof performance of the assembly at seams and connections.
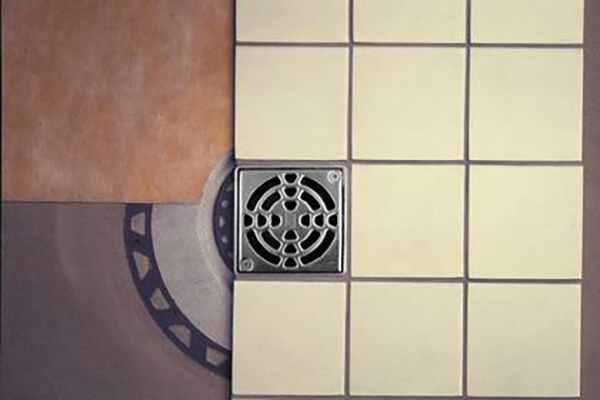
The grate assembly, which is comprised of a square grate, the height adjustment ring, and the lateral adjustment ring, is set with unmodified thin-set mortar. The height of the grate is adjusted via the height adjustment collar and aligned flush with the top of the covering. Since the diameter of the height adjustment collar is smaller than the opening of the bonding flange, the grate can be positioned to match the joint pattern of the tile covering.
For tile installations using the thin-bed method, apply unmodified thin-set mortar directly to the exposed Schluter-KERDI surface and install the tiles, ensuring full coverage. For acid-resistant coverings, use an epoxy adhesive to set and grout the tile.
Shower Bases Constructed with Schluter Prefabricated Shower Substrate
The substrate must be clean, even, and load bearing. Any leveling must be done prior to placing the tray. If necessary, cut the KERDI-SHOWER-ST tray to size prior to application. The tray should be cut by equal amounts on all four sides to ensure a consistent height of the first course of tile. After locating the correct position (use KERDI-SHOWER-ST as a template), cut a hole in the substrate for the drain.
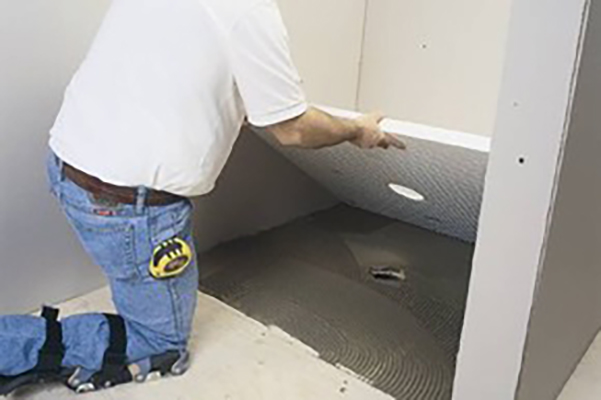
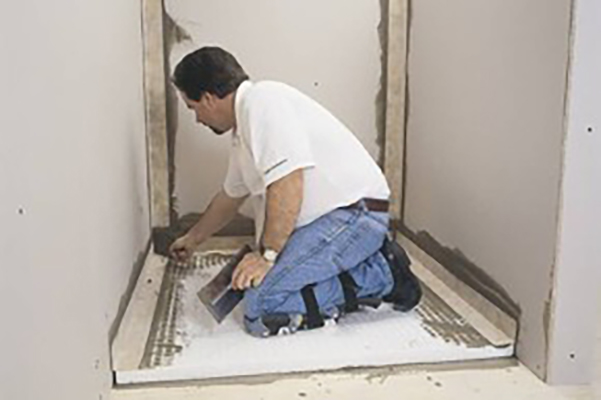
Apply unmodified thin-set mortar to the substrate using a 1/4″ x 3/8″ (6 mm x 10 mm) square- or U-notched trowel. Place the KERDI-SHOWER-ST, making certain to solidly embed the tray in the mortar. Check the underside of the tray to ensure that full coverage is achieved.
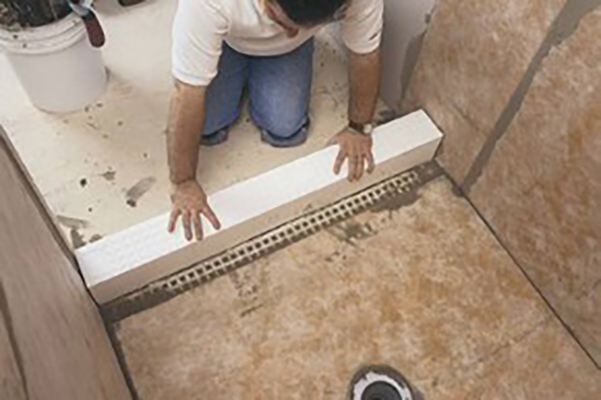
If necessary, cut the KERDI-SHOWER-SC to length with a handsaw. Apply unmodified thin-set mortar to the floor and to the edge of the shower tray using a 1/4″ x 3/8″ (6 mm x 10 mm) square- or U-notched trowel, and press the curb firmly into place.
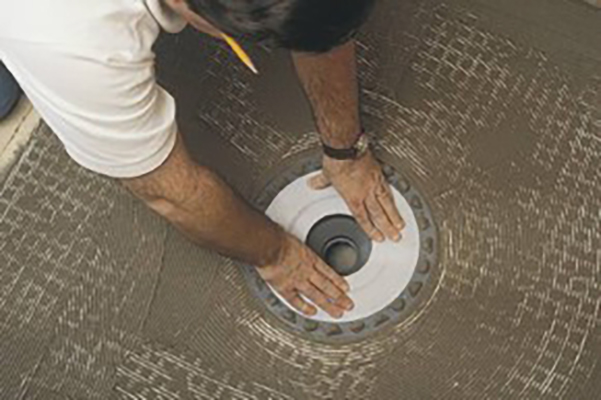
If there is access to the plumbing from below and the waste line can be connected after installing Schluter-KERDI-DRAIN, apply unmodified thin-set mortar to completely fill the step in the shower tray using a 1/4″ x 3/16″ (6 mm x 5 mm) V-notched trowel. Press Schluter-KERDI-DRAIN firmly into the mortar, ensuring full support of the bonding flange. When job conditions require the setting of Schluter-KERDI-DRAIN by the plumber prior to the installation of the Schluter-KERDI-SHOWER-ST tray (or when there is no access to the plumbing from below), install the KERDI-DRAIN to the appropriate height using the detachable center section of the tray or the foam spacers included with the drain. Before installing the Schluter-KERDI-SHOWER-ST tray, apply thin-set mortar to the substrate and to the top and bottom of the detached center section. Slide the center section into place below the drain to ensure solid and uniform support of the bonding flange.
Note: Schluter-Systems recommends installing the KERDI-SHOWER-ST tray prior to setting KERDI-DRAIN whenever possible. This method affords the installer greater control over the final position of the drain and makes it easier to obtain full support under the bonding flange.
Apply a bond coat of unmodified thin-set mortar to the tray and bonding flange using a 1/4″ x 3/16″ V-notched trowel. Embed Schluter-KERDI in the thin-set mortar and work the membrane onto the entire surface to ensure full coverage and remove air pockets. The KERDI is carried to the step in the fleece-laminated bonding flange (template provided). Be sure the connection between the KERDI and KERDI-DRAIN is secure.
Note: A sheet of cardboard can be placed on the floor to protect the KERDI during subsequent steps.
Construct floor/wall, floor/curb, and wall/wall connections using Schluter-KERDI-BAND or cut sections of KERDI. Seams are easily constructed by overlapping the edges of KERDI or KERDI-BAND by 2″ (50 mm) using an unmodified thin-set mortar.
Seal the shower curb/wall junction using Schluter-KERDI-KERECK or Schluter-KERDI-KERECK-F inside and outside corners and unmodified thin-set mortar.
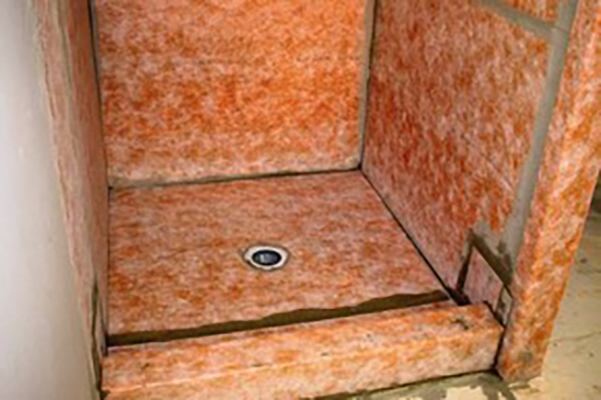
Apply a bond coat of thin-set mortar to the shower walls and curb using a 1/4″ x 3/16″ V-notched trowel. Embed the KERDI in the thin-set mortar and work the membrane onto the entire surface to ensure full coverage and remove air pockets. The KERDI is carried to the height of the shower head (at minimum).
Note: The thin-set mortar used for bonding Schluter-KERDI to the wallsand curb must be appropriate for the substrate and must penetrate and engage the KERDI fleece. For most substrates (e.g., drywall or CBU), an unmodified thin-set mortar is used. Seams in the membrane are constructed by overlapping the edges of KERDI or KERDI-BAND by 2″ (50 mm) using an unmodified thin-set mortar.
Note: Any protrusions through the KERDI membrane (e.g., mixing valve, shower head, etc.) must be treated with Schluter-KERDI-BAND and Schluter-KERDI-FIX, or equivalent sealant, to ensure a watertight seal.
Once the entire membrane, including seams, corners, curbs, and connection to drain, have been completely bonded and, therefore, waterproofed, the assembly is ready to be tiled.
Note: Prior to setting tile, if the assembly is to be water tested, wait 24 hours to allow for final set of the mortar before testing to ensure waterproof performance of the assembly at seams and connections.
The grate assembly, which is comprised of a square grate, the height adjustment ring, and the lateral adjustment ring, is set with unmodified thin-set mortar. The height of the grate is adjusted via the height adjustment collar and aligned flush with the top of the tile covering. Since the diameter of the height adjustment collar is smaller than the opening of the bonding flange, the grate can be positioned to match the joint pattern of the tile covering.
For tile installations using the thin-bed method, apply unmodified thin-set mortar directly to the exposed Schluter-KERDI surface and install the tiles, ensuring full coverage. For acid-resistant coverings, use an epoxy adhesive to set and grout the tile.


